A Brief Guide to Making a Custom Motorcycle Seat from Scratch
A Brief Guide to Making a Custom Motorcycle Seat from Scratch
Click HERE for the Main Information Page for Elite Comfort Seats and Upholstery
While not rocket science, there are a few things to bear in mind if you are making a motorbike seat from scratch. If you want to upholster and cover a custom seat, using some of these ideas will hopefully improve the finished seat and make it much easier and cheaper to trim and finish.
Many people who are making a "special" come to us with what is basically a flat piece of metal or fibreglass, normally cut to the shape they require, and often with the rear part bent up a bit to provide some kind of a bum stop. They ask us to make the foam and upholster it.
This is ok if money is no object, or if the overall style and design of the bike warrants a flat base and that is definitely the shape that is wanted. But it is not the ideal base for a decent looking seat, as it will cause problems when foamed and covered, and it takes longer and costs more to do. We can take a flat base, and come up with what is hopefully a nice result, but it takes longer and you will be paying us more than if it had a little more planning!!
A flat metal or fibreglass seat base suffers from the following six issues:
-- There is no easy way to fix the seat cover to the base. Most modern seats have the cover stapled on, which is obviously not possible with a metal or fibreglass base. Glue on it's own is not ideal, as it will peel off with time, no matter how good the glue. In particular with this flat type of base, the cover will go down the side of the foam, and then turn a right angle to go under the base. This makes a particularly poor basis for fixing with glue, as the cover only goes round a right angle and every time you sit on the seat it will peel it a bit from the edge. A glued fixing is much stronger if you can fold the cover back on itself as it goes round the base, ie there needs to be some kind of a rim around the base..
-- The edge of the metal base will show by pushing through the seat cover, because it is harder than the foam above it. The flat edge of the base will also tend to cut through the seat cover if anything hits it from the side, even fairly gently. A plastic trim can be put on the edge of the base before the cover is put on, this will help but not eliminate this problem. Also, If the edge of the seat pan is further out than the frame rails of the bike, it may also cut into the rider's leg in the event of an accident. A rim round the base will solve this problem.
-- The normal way to fix the cover to a metal or fibreglass base is to use pop-rivets. BMW used this method on their bikes from the '80s, which had a metal, and sometimes a sort of fibreglass base. They also used thin strips of metal or plastic underneath the rivets, to further clamp the seat cover material. This method works, but it is time consuming. When putting on a seat cover using staples, you normally put the first ones in and adjust the cover to get it square etc, particularly if it is has a pattern on it, and then take the first few staples out and replace them as they are unlikely to be in exactly the right place. This is difficult to do with rivets, as you are unlikely to get the first few in exactly the right place first time, and they are more difficult to remove than staples.
-- If the base is flat, these rivets will be probably be visible from the side or back of the bike, and look bad.
-- Modern bike seats do not have flat seat bases. More or less all of them have some curve in the base when looking in cross section from the front, and the sides extend downwards a bit to cushion the inside of the riders thighs. If a seat is flat with square edges, almost inevitably if sat on with an upright riding position, the sides will dig into the inside of the riders thighs unless the base is quire narrow at the front. This is not so important with the racing style position, as the legs don't go down the sides of the seat so much. Older bikes years ago did have more or less flat bases, but they had a lot more foam on them and generally the seats narrowed considerably at the front, to achieve the same effect as a curved base.
These problems can be solved by making the seat base out of plastic or wood, so staples can be used, and if possible by putting some kind of a downturned rim around the base.
Obviously if plastic or wood can be used, then the cover can be fixed using staples, which is quicker and easy to do. However it is still advisory to put a rim around the base, to hide the staples/rivets. The rim also greatly strengthens the base, and makes it more rigid.
If you look at any manufacturer's motorcycle seat base, either metal or plastic, it has a down turned rim around the edge. This allows the seat cover to be pulled back on itself before it is fixed on, which is much stronger, however it is fixed, and helps stop glue from peeling. It also hides any fixings from view, and means that if the seat is hit from the side, the base will not cut through the seat cover, nor the rider's leg.
Metal bases from older bikes normally had this rim, this allowed the cover to be clipped on in some way from below. There was then some kind of a trim fixed on to cover the clips. Alternatively the rim sometimes turned back on itself again, so these clips were out of sight.
If you are starting absolutely from scratch, if possible you should be aiming to produce a base with a rim round it, whatever the material used.
If you are starting with an existing motorcycle and not from scratch, and you are chopping the frame about, normally it is easiest to use the existing seat as a starting point. The existing seat base will fit the uncut parts of the frame exactly, and also the back of the original petrol tank if that is to be used, so the seat base can just be cut and altered to match the change in the bike frame. This normally saves a lot of time, and has excellent results, as in the first example below.
Metal bases can easily be cut and welded, and it is actually just as easy to do this with plastic bases. Most are made of polypropylene (PP). This is easily cut and can often be bent into a new position or shape. We have a plastics' welder and PP filler rods here if you don't have access to them.
Customers' examples
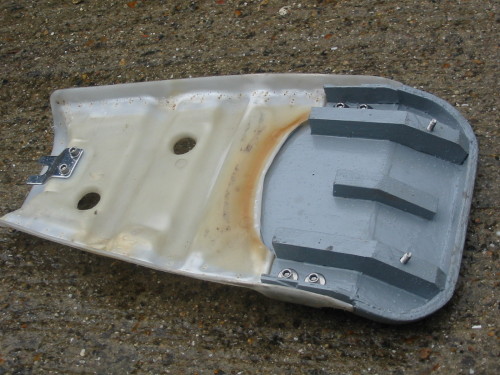
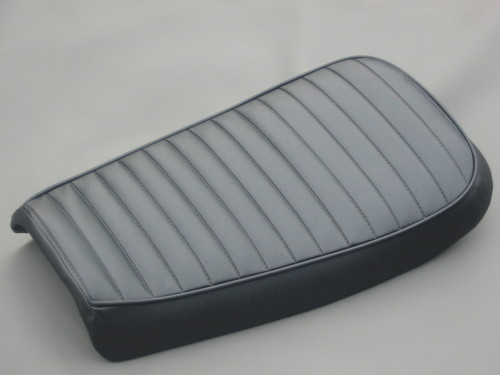
Below are two pictures of a customer's custom seat for a Yamaha XT500. After altering the rear subframe of the bike to the shape he wanted, he started with the original seat, cut it to fit the shape of his new rear subframe, and made up an extra section out of wood. This is much easier and quicker than starting from scratch, and the base was simple to re-foam and re-cover.
Below is a custom made (lowered) metal seat base for a Vincent series D Rapide, made from scratch. The customer has incorporated a turned down rim round the edges, which makes it easier to upholster. He has turned the rim upwards at the back, which is not ideal, but he is constrained by the early "monoshock" type rear suspension on the Vincent. At maximum suspension deflection the rear mudguard rises to within a few millimetres of the seat base, so he has had to put the rim upwards rather than downwards to stop the mudguard hitting the rim. This is better than no rim at all!
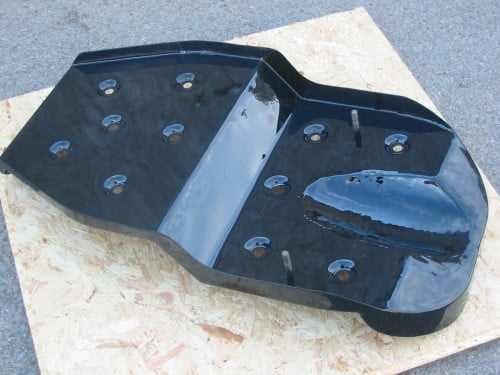
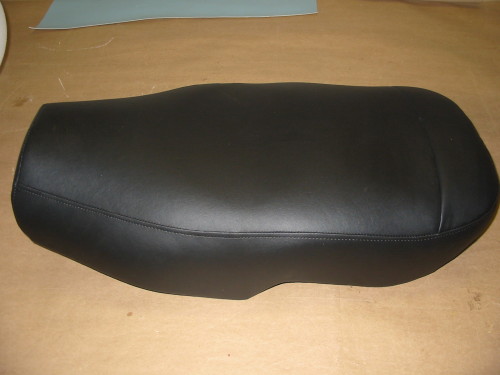
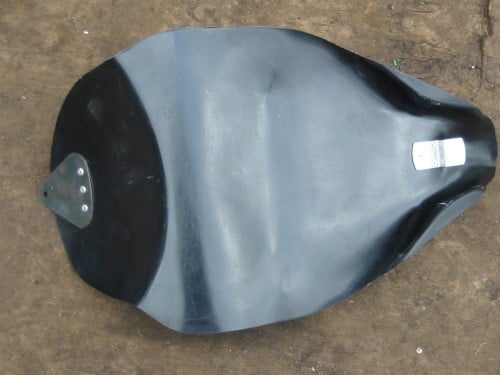
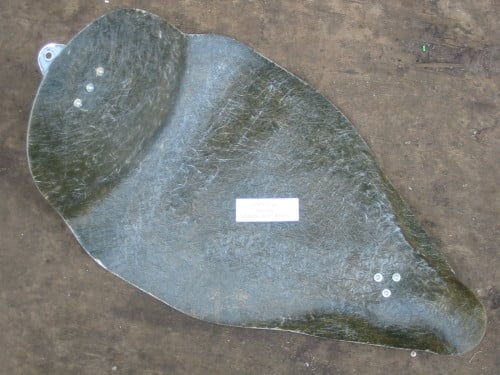
Below we have a couple of pictures (top and bottom of a custom seat pan) showing "how not to do it" if it can easily be avoided. This seat pan was purchased by a customer from a custom bike parts manufacturer in Germany, designed to fit one of their custom frames, and it really does look like a bit of an afterthought. Not only is the seat pan basically flat, and also made of fibreglass, but the edge of the fibreglass varies in thickness from a few millimetres for most of it, to about ten mm on a couple of thicker parts (this is difficult to see in the photos). This makes it impossible to put a plastic trim neatly round the edge of the seat base, and more difficult to make the end result look nice. In addition, they have riveted on a mounting plate which sticks up at the back of the base, making a neat job of trimming it almost impossible. We removed this plate before trimming by drilling out the rivets, and replaced it afterwards.
To be fair to the manufacturer, the thicker parts round the edge were probably there to strengthen it at the front, and the base was fairly rigid.
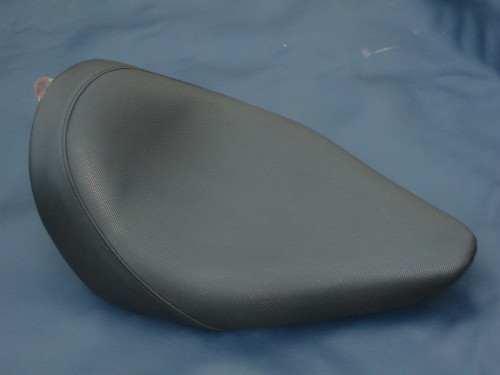
By making this base the way it is, the time and cost of foaming and trimming it was about three times a normal one. The finished seat is also shown below, it looks deceptively simple!
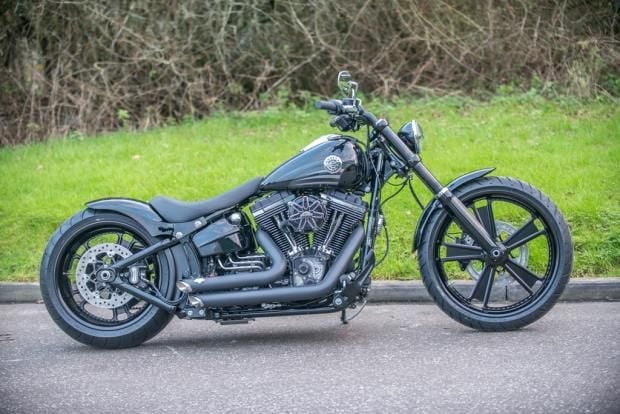
This seat was made for the custom bike "Blackbeard" by Shaw Speed and Custom

A CASE STUDY: PROBLEMS!
The seat fitted exactly, and looked great, but the problem was that when you sat on it, the foam squashed down, and the sides of the seat unit dug into the inside of the legs/thighs
He rang on Thursday morning at about ten and said he was coming in. A couple of hours later he came in (from 9 miles away) in the car, without the bike. I made the points listed below, and said that I felt they were the reasons for the problem. I offered to re-do the seat, but that the bike had to be there as previously agreed, so we could try and sort the problems properly, otherwise it would just be guesswork and we would be going round in circles. I said the problems were not really our fault, but due to the application and problems listed below, which we weren't aware of when we originally did the seat. I said that a harder foam would possibly help due to his application, but I didn't think the resulting seat would be "comfortable", It would be very hard. We would have to completely re-do the seat, and as a compromise to re-do it for £50, which I thought was more than fair. He agreed to come back with the bike.
He came back at about quarter past three,
He made the point that the foam was too soft, it was a ++++ job, etc etc, and that he wanted it foamed "properly". He said it was ++++ foam and he wanted it done properly for nothing.
We made the following points:
-- That we had done precisely what he had asked us to do, made the seat to exactly the shape he asked for, and we showed him the foam before doing the job, and he agreed to it. The foam we used was exactly as we had used on many hundreds of other seats achieving excellent levels of comfort. It apparently wasn't working successfully in this application, but we hadn't seen the application before doing the job, just the bare seat base.
A block of foam has a more or less rectangular shape with corners at the upper edges (although we had radiused them a bit so it didn't literally look completely like a rectangular block). These upper foam corners are not supported by anything behind them, so they are soft, so if you pull the cover down tight, they just squash down and inwards. To achieve the flat shape he wanted, the cover we had made was also looser than normal (not baggy, it still fitted properly), because he wanted a flat topped shaped seat. Also, the base was made of very thin fibreglass, and we were wary of pulling the cover too tight around it as the edges of the base would flex up and distort.
-- When you make any new and innovative project, or changes to an existing item, there are always unexpected problems and consequences of the design aspects and changes made, you can't anticipate all of them. That is why prototypes are made. We felt he was asking us to develop and prototype his project for free.
We have extensive experience of what it takes to make normal manufacturers' motorcycle seats comfortable, and the right foams and materials to do the job. We can normally do these without seeing the bike itself as we have done hundreds of them.
